
First, you need land and access to trees! I bought this land after a logging company cleared it to sell the timber. For some reason, they left a large pile of loblolly pines. When I saw that, I thought, “I am going to build a cabin.”

This is what I had to work with. It was a bit of a challenge, but it was fun.
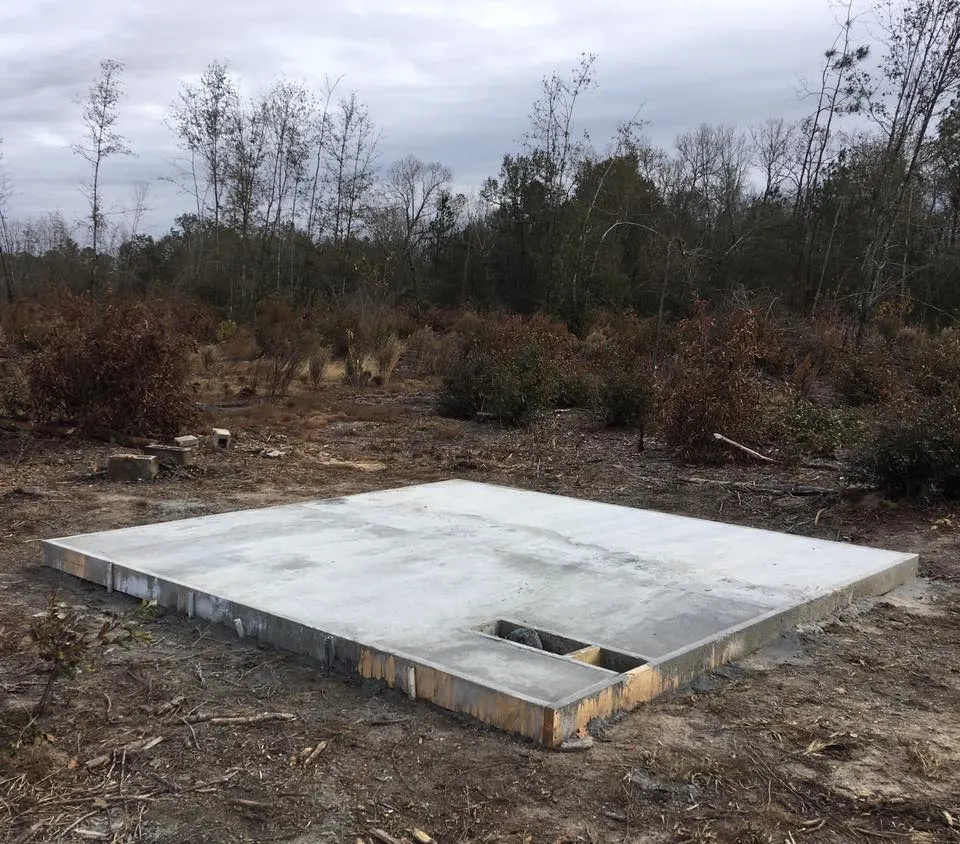
The first step is to lay a concrete slab to build on. You can build directly on the ground, but the logs will likely begin to rot faster. This was 200 square feet (18.5 square meters). I wanted a tight, cozy cabin. I also gauged how many logs I had without having to cut more. And I’m mildly fascinated by tiny houses. The opening at the bottom right is for a drain, in case I were to ever install a sink inside.
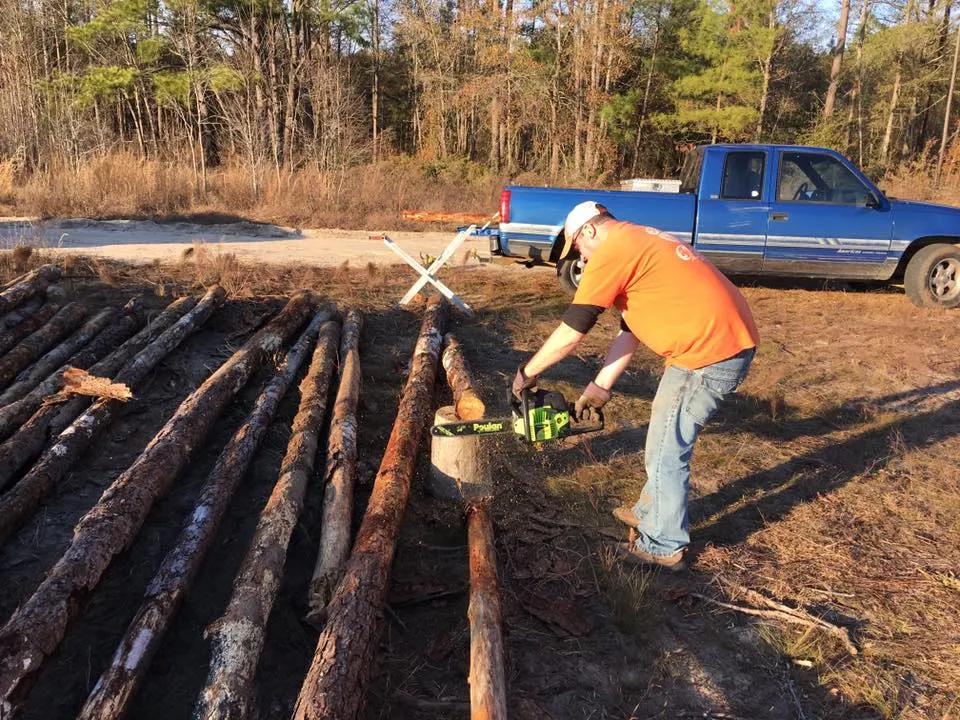
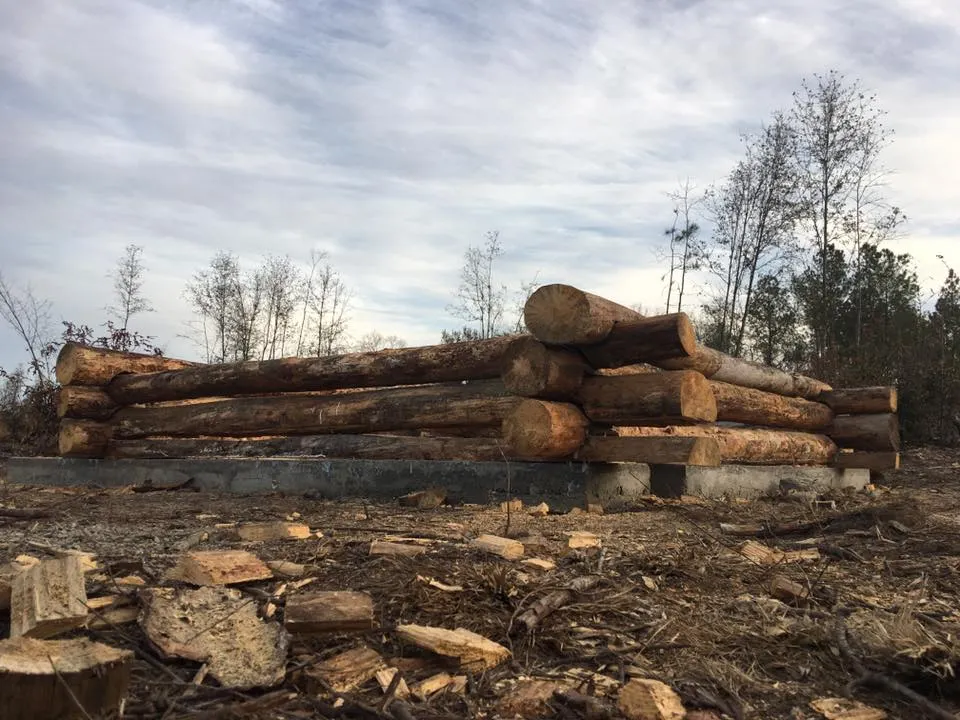
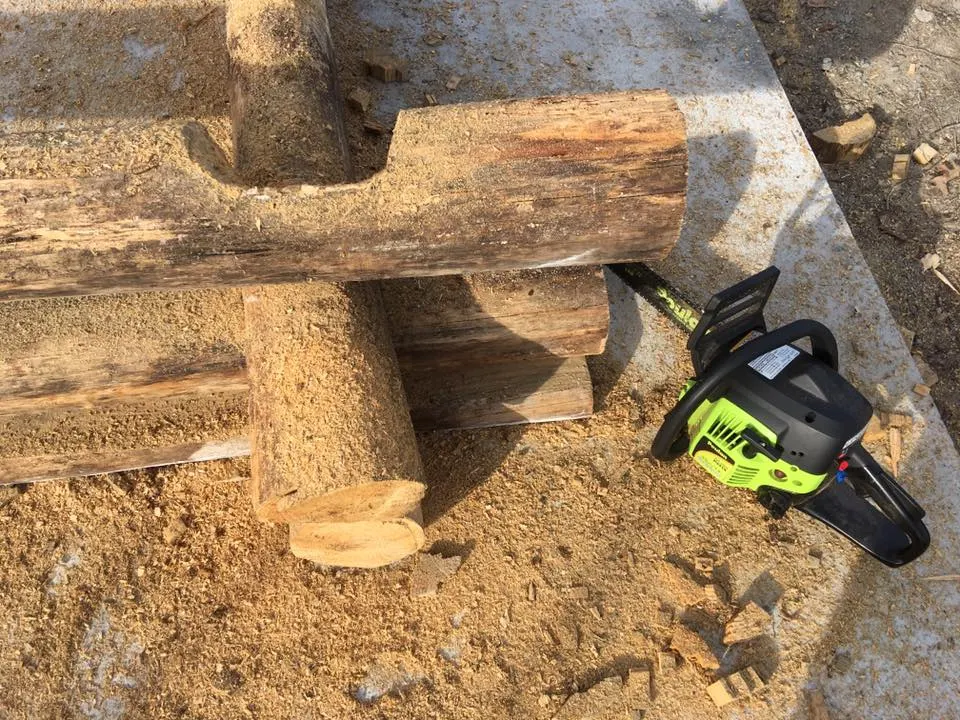
The next steps require a chainsaw, a stand, and a winch (and perseverance). You will need to clean the limbs and the bark. Leaving the bark on could promote rotting. And then cut the logs to length. I made 10-foot (3-meter) lengths and kept the length uniform for all four walls.
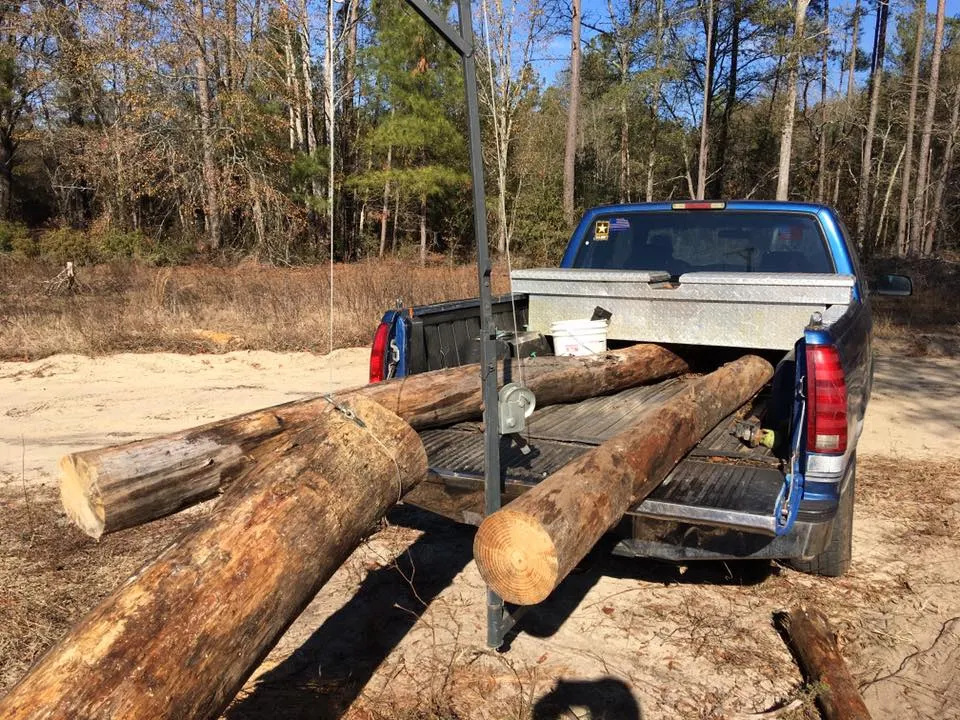
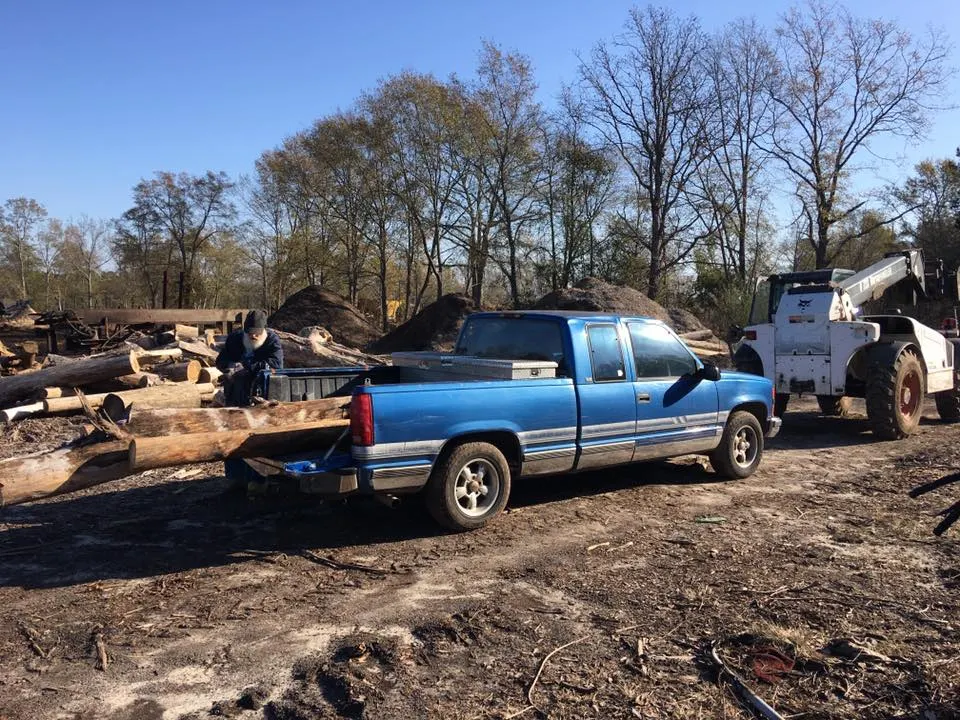
Since my build site was not next to the logs, I had to use a come-along and a winch to load the truck and drive the logs over to the build site. I did this about 12–14 times to get all the logs to the cabin site.
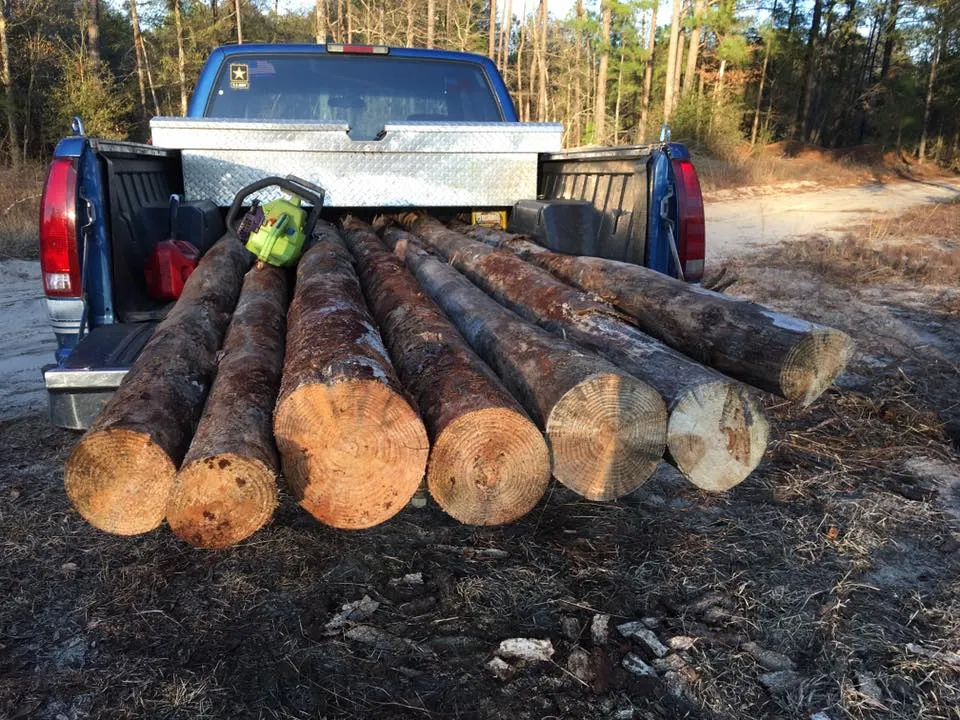
Your most important logs are called sill logs. Sill logs are the bottom logs of each wall. They are flat on the bottom, so they sit flat against the foundation. I found my biggest logs and took them to a nearby lumber yard.
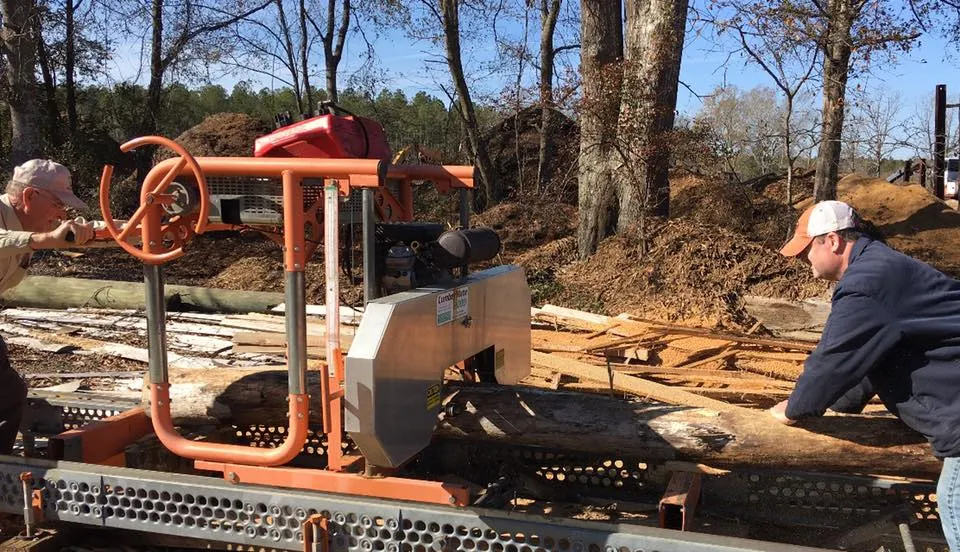
You can hand cut, eyeball with a chainsaw, use a chainsaw mill for your log cabin sill logs, or go to your friend Haynes, an energetic octogenarian, Jesus-loving, forklift driving, storytelling, local tycoon of all things wood, and sawmill master. I chose the latter.

Now you are ready to start building your cabin. The first step is to put a layer of silicone between the sill logs and the concrete to prevent rotting.

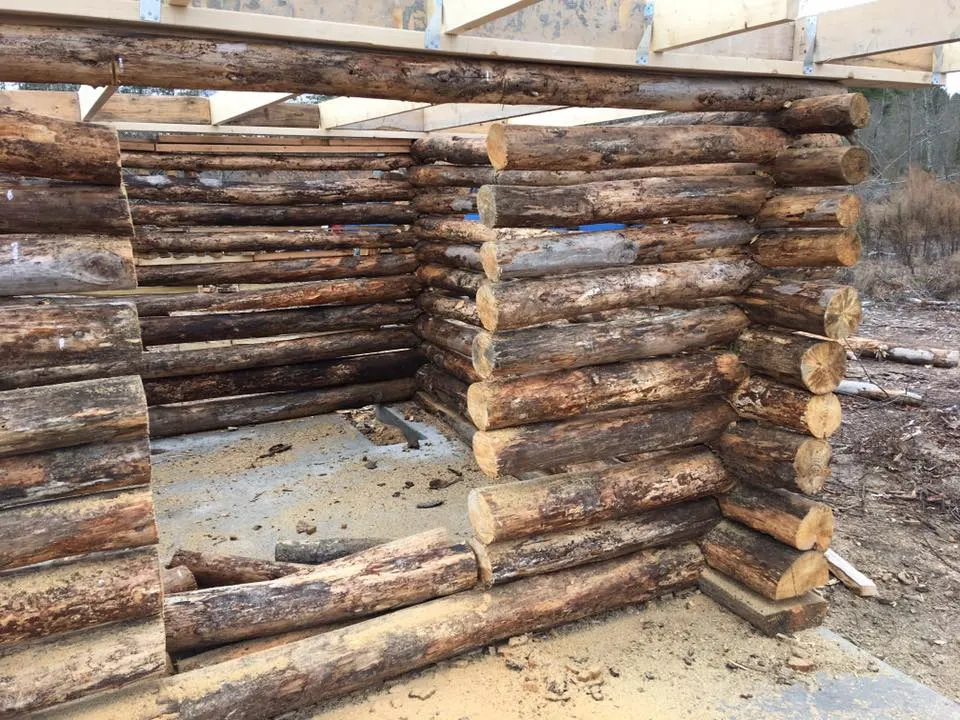
I went with a traditional rounded notch. These notched logs started on top of the sill logs. I used a cardboard template instead of multiple ruler measurements for notching the logs. I used a chainsaw for all the cuts and notches. Sometimes a hammer to knock out leftover bits after I made the cuts.
From that point, you simply notch and repeat. I didn’t have any electricity out here. I just used a chainsaw and a level and kept going up.


Dear future cabin builders: When you haven’t cut a door in your cabin yet, don’t put your gloves on the top log and work on said log. You will hear a “flop flop” sound as your gloves fall inside. You’ll then have to test your climbing skills.
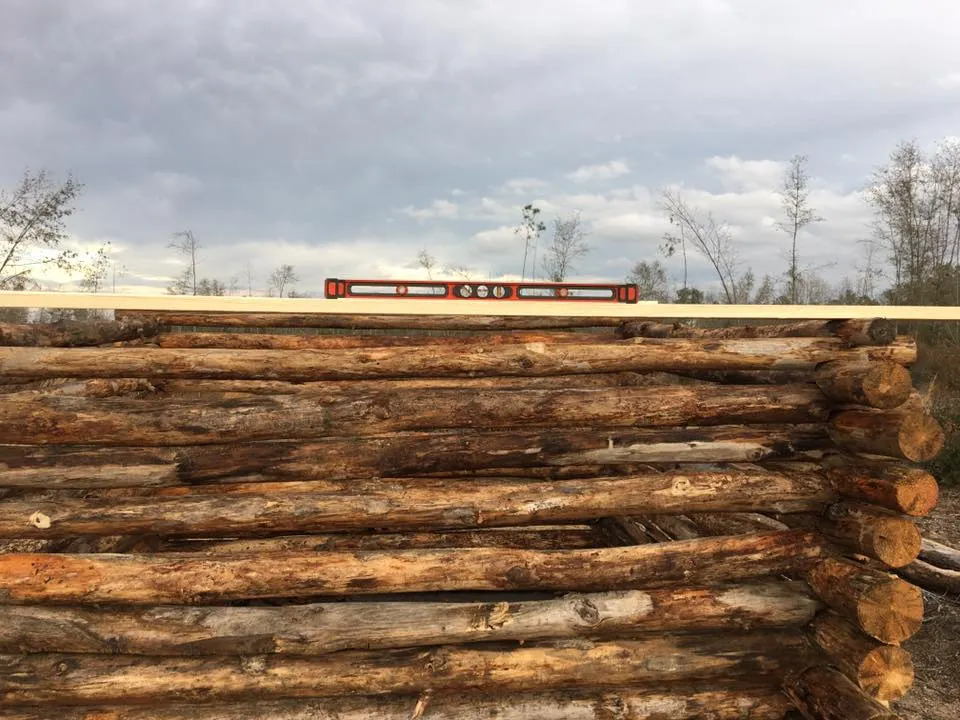
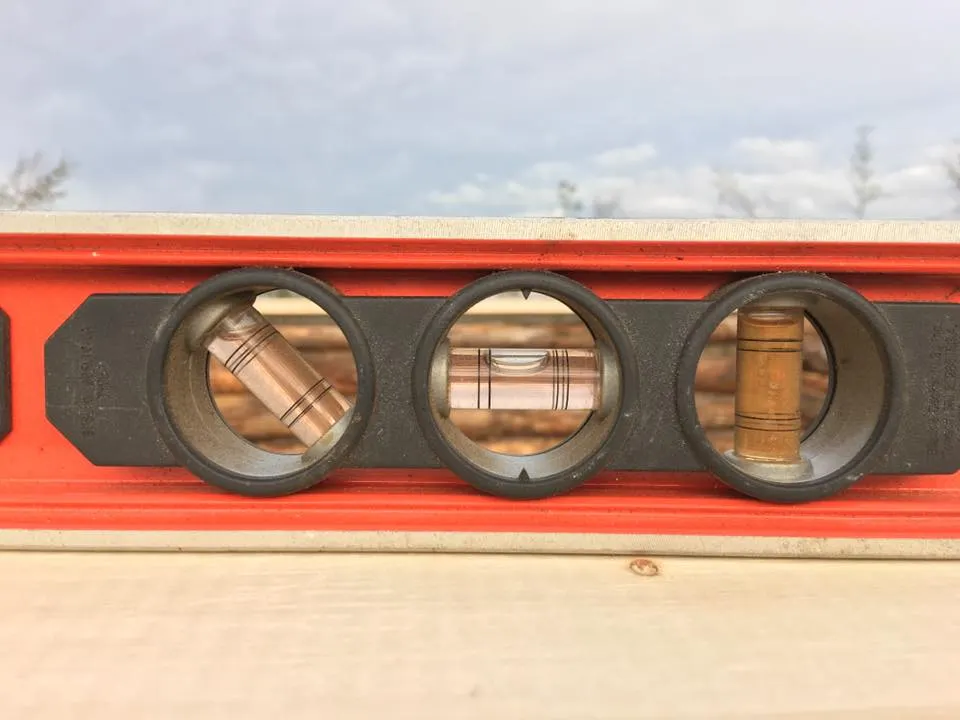
All logs are done at this point, so I attached 2×6 lintels for attaching the rafters. Be careful when selecting logs, diameters, and depths of notches to keep the walls level as you build upward. This was pretty dead-level.

I used lag bolts to attach the lentils to the logs.


When you are building your roof, you can choose to use natural materials from your land. I decided, however, to go to the local hardware store and use lumber because it would last a long time. These are the purlins that support the roof.

You will want to measure out a door and cut that with a chainsaw before you finish the roof. It will help you reach everything.

I also purchased corrugated steel sheets for the roof.
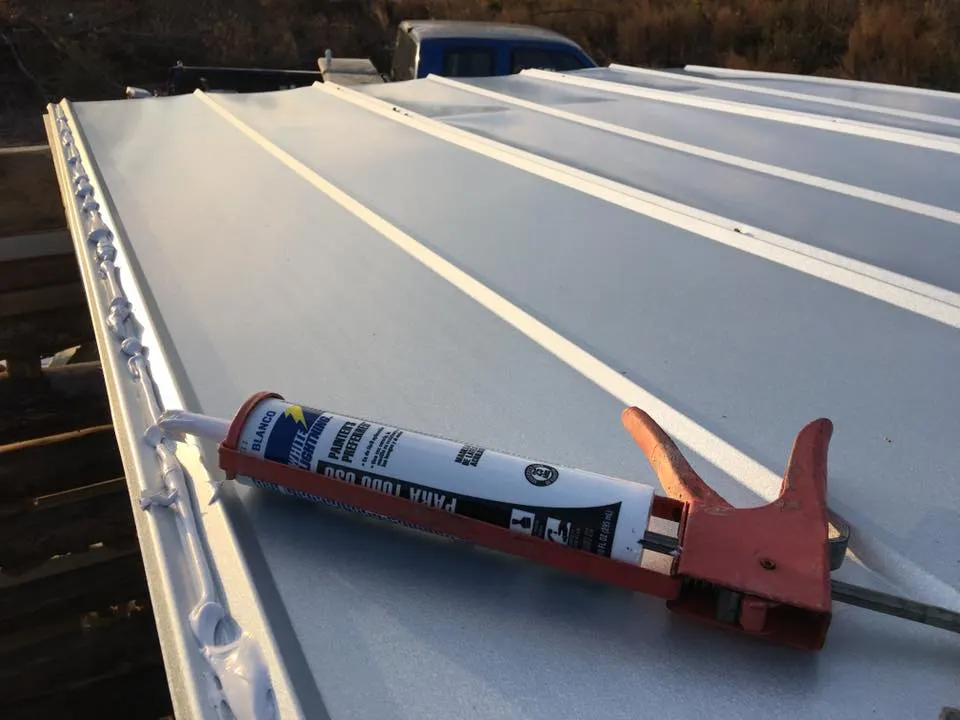
It’s essential to run a line of sealant between every sheet connection to prevent leaking.

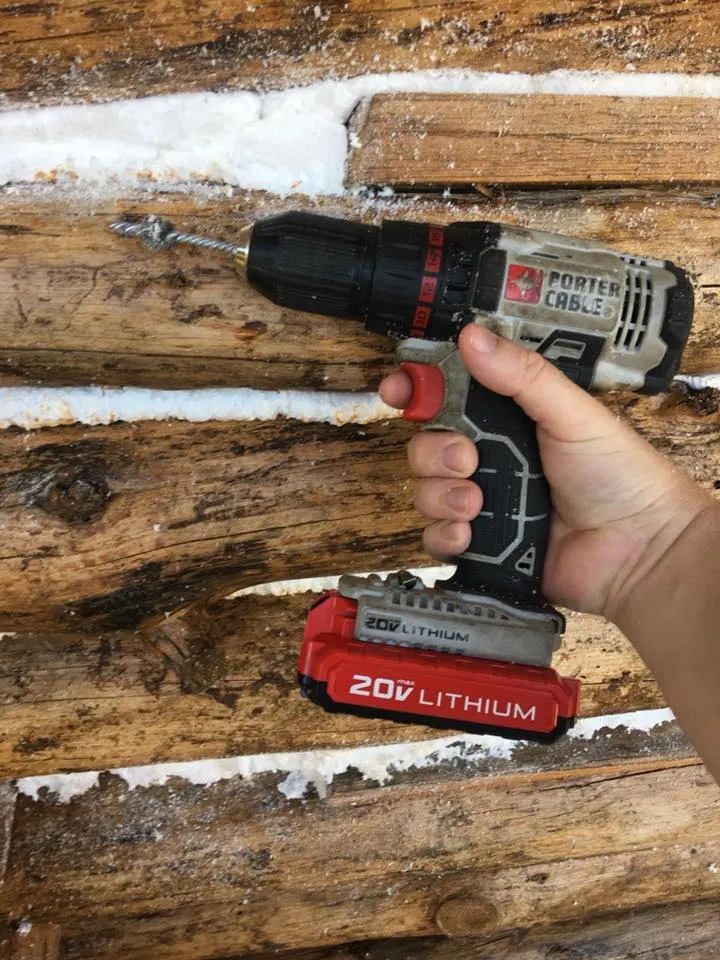
A battery-powered power driver is great for the roofing nails. Make sure to get roofing nails that self-seal, which also stops leaking.
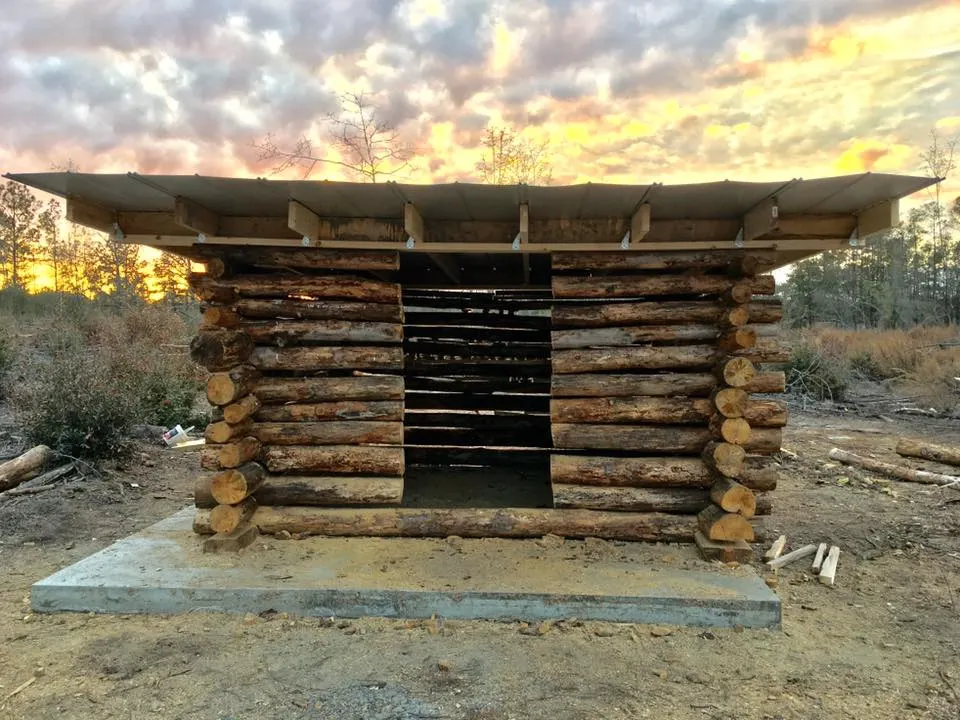

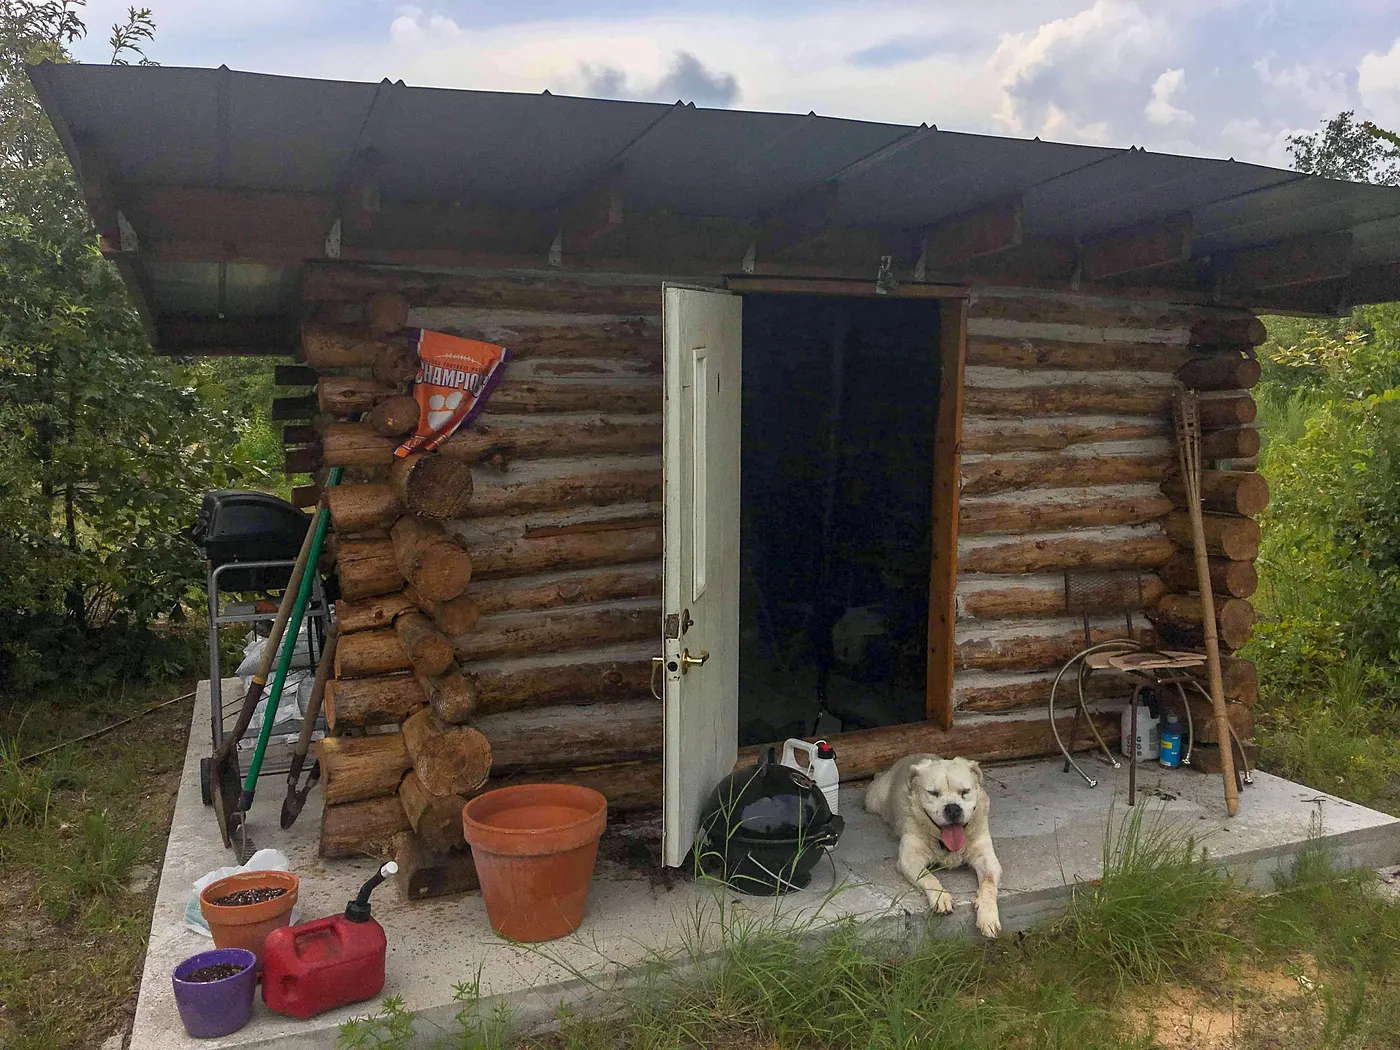
This is the cabin with all the logs done, the door cut, and the roof on. I framed the door and hung a piece of plywood in the doorway to keep animals out. And then I had to wait until spring to do the finishes. Some of those finishes required warmer temperatures and less precipitation.
Back at it in the warmer weather a few months later.

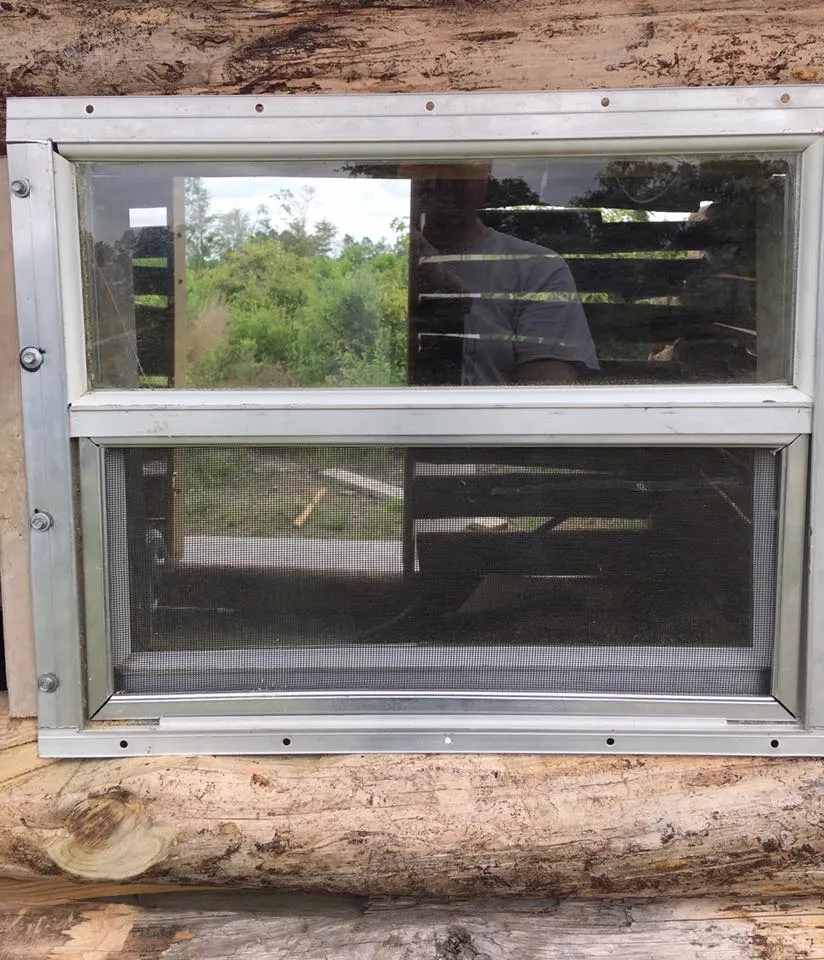
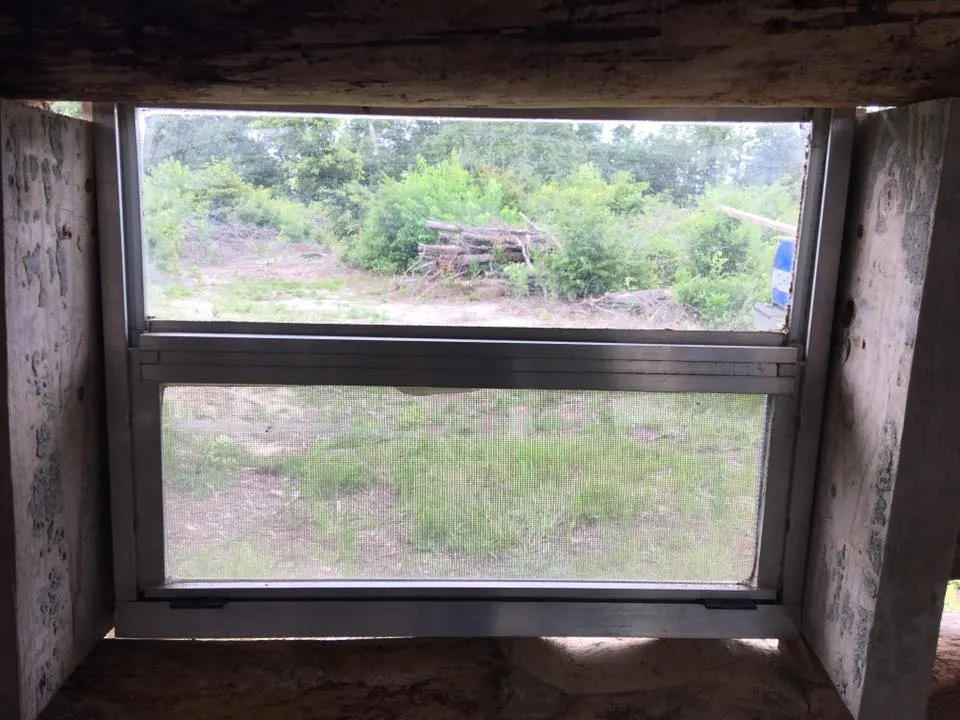
At the same mobile home supply store, I also purchased a small sliding window. I measured it to fit and cut out the logs with my chainsaw.
Now that the door and window are done, you need to fill in the log gaps, seal the wood, and insulate the cabin.

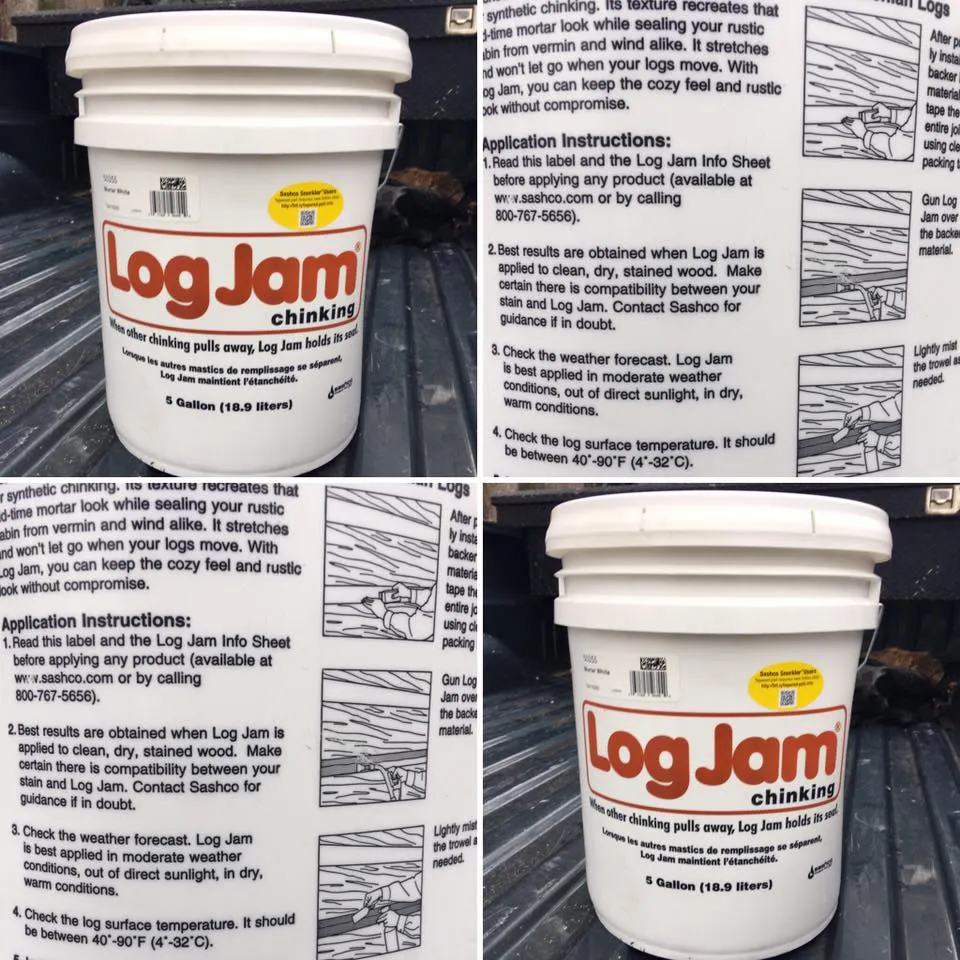
You know how so many log cabins have that line of white filler between the logs? That is called chink. I did a lot of research, and this product called Log Jam was highly recommended. It will expand and contract with the weather.
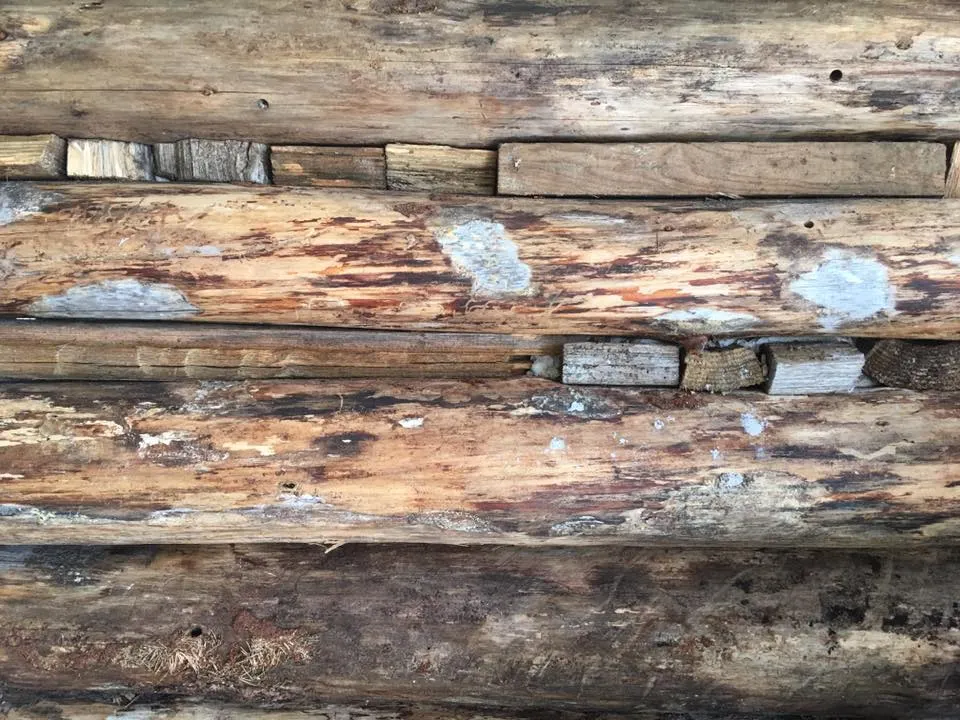
And in the photos above, you can see how you should fill in the gaps between the logs. This provides a surface for the chink to bind to as well as some insulation. I used all the wood and log chunks lying around the build site to fill in the gaps between the logs. I just pushed the chunks in the gaps by hand.

The chink is really like a thick putty. I discovered the easiest way to do it was to put on rubber gloves and smear it in between the logs by hand. It was so much faster and easier to control than using a paddle, stick, or brush.

After you have put the chink in between all the logs, you need to use a high-quality wood sealant on the entire cabin. This will prevent it from rotting.

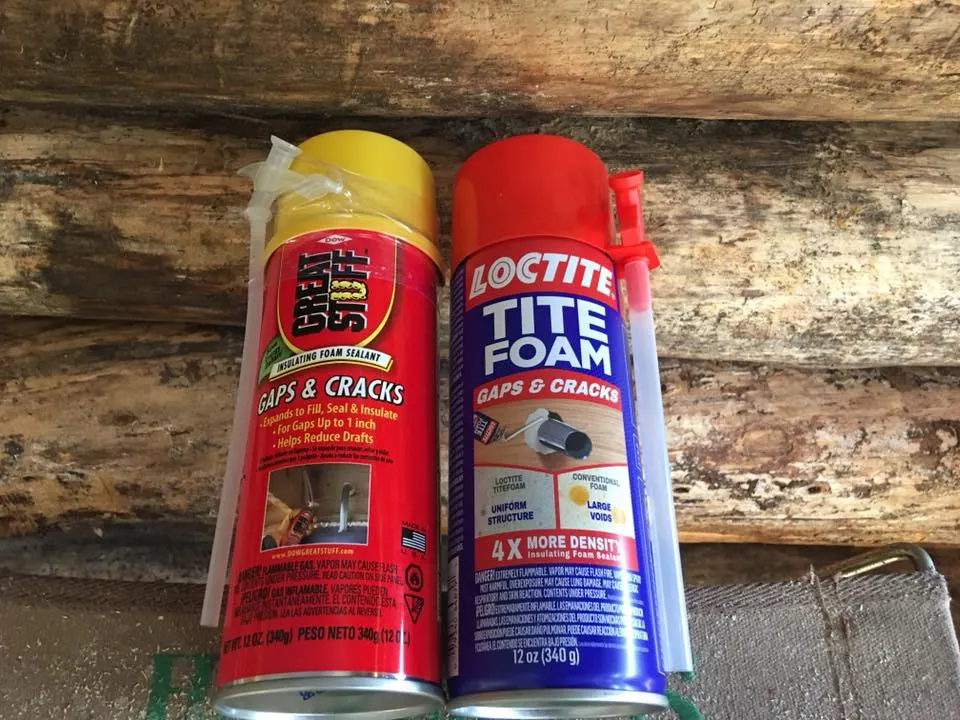
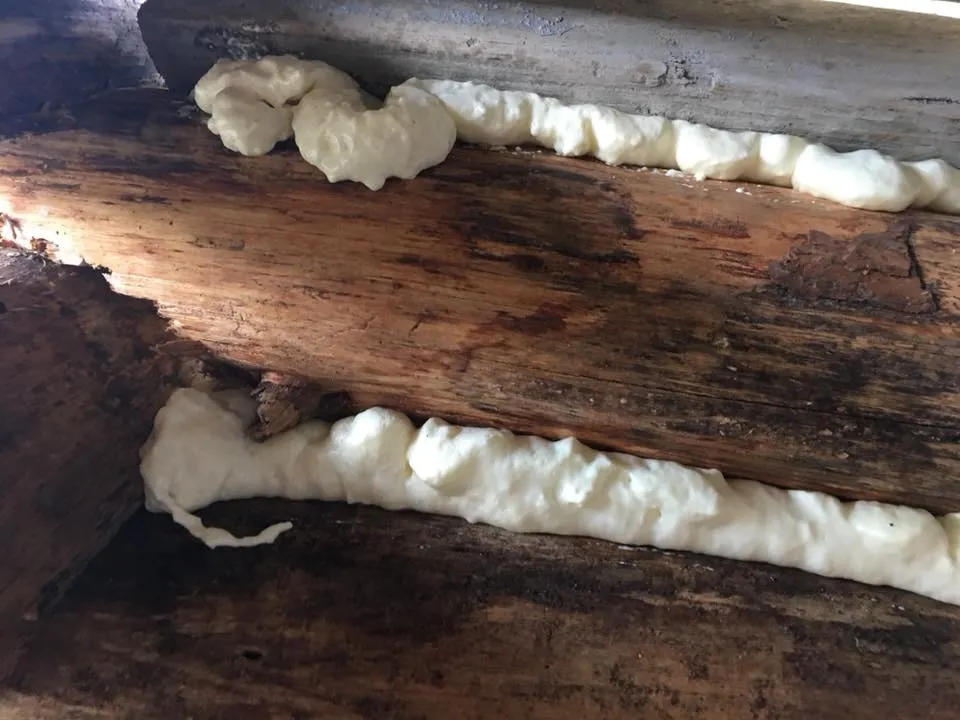
Next, you need to go inside the cabin. You will need spray insulation that you can direct easily. The chink is your barrier on the outside, and the insulation is your barrier on the inside.

You don’t have to do this, but I thought it looked nicer. You can attach a small wire brush to a power driver and smooth out the insulation lines.

That’s just about it for the construction. But you do have to make it nice inside too.

I hope you enjoyed this. And that you go build one too! Feel free to ask me any questions you might have.